I've stopped selling on ArtFire and have started my own web site. You can now visit me at www.llrodenjewelry.com. Nothing wrong with ArtFire but it wasn't a good fit for me. In the short time I've had my own site I've sold so much more than I did in a group setting. I'm still making and selling jewelry. My skills are transitioning from beading to gem stones and metal. I've been working on cutting my own stones and making my own settings.
The new site also has a blog feature that I'm transitioning to. It's much easier to maintain everything all in one place. I hope you visit me there.
Linda L. Roden
Sunday, February 3, 2013


Tuesday, October 23, 2012
Still here but quiet.
I find I'm reluctant to spend time on the computer. There are so many projects to complete and ideas running around in my head.
I recently completed a couture sewing class and have been practicing by making a dress for Emily. I'll find out this weekend if it actually fits her. This dress and other obligations took nearly a month of my free time. That's time I hate to lose but what can ya do?
I recently completed several jewelry pieces for a friend's wedding. I've also completed some other jewelry but haven't photographed it yet. I probably won't do any more jewelry photography until after the next show.
I'm also wanting to do more metal/stone/glass jewelry instead of so much beading. Don't get me wrong, I enjoy the beads but the rocks and metal are really calling to me.
There are so many social sites available and I wish I had more time to be social but I'm a hermit at heart and prefer my time in the basement. I have a show coming the first weekend of December that should be big. This is the 24th annual Olde Alton Art & Craft Fair. I've attended as a shopper, many times, this will be my first time as a vendor.
I have a few more pieces of jewelry to complete before the show as well as some more sewing to do for the grand-kids and myself. Can't there be more than 24 hours in a day? Just never seems to be enough time.
I recently completed a couture sewing class and have been practicing by making a dress for Emily. I'll find out this weekend if it actually fits her. This dress and other obligations took nearly a month of my free time. That's time I hate to lose but what can ya do?
I recently completed several jewelry pieces for a friend's wedding. I've also completed some other jewelry but haven't photographed it yet. I probably won't do any more jewelry photography until after the next show.
I'm also wanting to do more metal/stone/glass jewelry instead of so much beading. Don't get me wrong, I enjoy the beads but the rocks and metal are really calling to me.
There are so many social sites available and I wish I had more time to be social but I'm a hermit at heart and prefer my time in the basement. I have a show coming the first weekend of December that should be big. This is the 24th annual Olde Alton Art & Craft Fair. I've attended as a shopper, many times, this will be my first time as a vendor.
I have a few more pieces of jewelry to complete before the show as well as some more sewing to do for the grand-kids and myself. Can't there be more than 24 hours in a day? Just never seems to be enough time.
Thursday, May 31, 2012
Just talking
I've taken a bit of a break from jewelry making to get some children's sewing done. I'm still poking at the wedding jewelry but I have time to get to that.
This summer has already been busy. I've just returned from the usual circle trip of Kentucky(kids) to Florida(kids) and back through Kentucky to home. In the process I was able to go stupid in a few fabric stores and managed to overload my stash. So many cute fabrics for the grand-daughters and I'm nearly done with a two piece outfit for Austin.
I found some really bright multicolor daisy material and some stripe material in the same colors. Since Austin's middle name is Daisy I couldn't resist. The pattern is a wrap style over-dress and a slip style under dress. The over-dress is the daisy print and the under dress is the stripe. They can be worn together or as single dresses. I cut some of the daisy's out of the print and appliqued them to the skirt of the stripe dress just to add a little something extra.
Once I'm totally finished I'll post a picture.
I also got some butterfly print material. Austin and Emily are both nuts about butterfly's. I have material to make clothing, hats and booties for new baby and several pieces of material for myself.
I really don't have time to go to work every day. Too many projects to complete but I'm happiest when I'm in my basement messing with stuff.
In addition to full time work, hobbies and attending to aging parents, I'm also involved with DAR. We have several programs planned for this summer and it's keeping me very busy.
Busy = Happy.
Hope every one has a happy summer.
This summer has already been busy. I've just returned from the usual circle trip of Kentucky(kids) to Florida(kids) and back through Kentucky to home. In the process I was able to go stupid in a few fabric stores and managed to overload my stash. So many cute fabrics for the grand-daughters and I'm nearly done with a two piece outfit for Austin.
I found some really bright multicolor daisy material and some stripe material in the same colors. Since Austin's middle name is Daisy I couldn't resist. The pattern is a wrap style over-dress and a slip style under dress. The over-dress is the daisy print and the under dress is the stripe. They can be worn together or as single dresses. I cut some of the daisy's out of the print and appliqued them to the skirt of the stripe dress just to add a little something extra.
Once I'm totally finished I'll post a picture.
I also got some butterfly print material. Austin and Emily are both nuts about butterfly's. I have material to make clothing, hats and booties for new baby and several pieces of material for myself.
I really don't have time to go to work every day. Too many projects to complete but I'm happiest when I'm in my basement messing with stuff.
In addition to full time work, hobbies and attending to aging parents, I'm also involved with DAR. We have several programs planned for this summer and it's keeping me very busy.
Busy = Happy.
Hope every one has a happy summer.
Thursday, May 10, 2012
New project
Austin's outfit will be delivered this week. I hope she likes it. Now I'm on to other stuff.
A friend has asked for wedding jewelry. I'm making several pieces to give her plenty of options. Lots of crystal in navy and clear with accents of white pearls. So far two necklaces completed and a bracelet in the works.
Pictures will be posted when the projects are complete.
A friend has asked for wedding jewelry. I'm making several pieces to give her plenty of options. Lots of crystal in navy and clear with accents of white pearls. So far two necklaces completed and a bracelet in the works.
Pictures will be posted when the projects are complete.
Sunday, April 1, 2012
Austin's New Outfit
I've inherited a bunch of material, another sewing machine and a new sewing table. This has put me in a sewing mood. This time Austin is benefiting from the urge. Here is the process and the results.

I've used this pattern a few years ago to make an outfit for Emily. This time I decided to hot-rod it up a little.
 I re-drew the pattern to Austin's size and started out with a dark lavender material for the main body.
 I used a white background material with lavender flowers for the accent material. The top is lined so I needed duplicates of the material.
 I made a diagonal cut and joined the contrasting pieces.

I covered the seam line with wide, white rick-rack.
 To make the lining I needed to cut a mirror image.
 Here's a view of the front after assembly.
 And a view of the back. As you can see I continued the contrast material to the back. For the straps I put in 3 button holes on each strap to make the length adjustable.
 To add a little pizazz I made a rick-rack flower broach with flower bead centers with 3 leaf beads on the outer edge. I added a pin to the back so it could be removed for washing.
 Here's a closer view of the broach.
 Next came the crop pants. I used the light color material for the tie belt. And cut the length a little shorter so I could add a ruffle to the hem.
 Here's the pants with the ruffle hem trimmed with the wide, white rick-rack. And there you have it. Austin's new outfit.

I've used this pattern a few years ago to make an outfit for Emily. This time I decided to hot-rod it up a little.


I covered the seam line with wide, white rick-rack.


Saturday, January 21, 2012
More Copper Work
As usual I'm slow to add to my blog. I forget to take the pictures as I start a new project but this time I remembered before I got too far.
Some time ago my Dad worked some copper pipe on his lathe for me to turn into bracelets. The first couple attempts didn't turn out so good but I kept the rejects figuring I eventually do something with them. It's eventually. As you can see the pipe was lopsided and dented. The Knurling was pretty deep and uneven.


I used my Dad made grinding wheel to knock off as much of the knurling as I could.


The center was cut too deep for me to get it totally clean but I kept working at it. After using the grinding wheel I worked at it with files and was able to knock off some more of the texture. I got it as clean as I could and decided to work with the marks that were left. I annealed it and marked it for forming.

I used my new stakes and hammers to reshape the metal.


I used the sharp, straight edge of a jewelers hammer (not shown) to add more directional marks all over the surface of the bracelet. I hammered the edges with the same hammer for added interest.

Then I used my saw to open the tube into a cuff and rounded off the open edges with a file. I liked what I had. It was simple but eye catching.
 Once I was happy with the texture and shape I gave it a good polish with a brass brush on my flex shaft. Then it got a coat of wax.

 From old plumbing pipe to shinning bracelet. Then to my mother's arm. She was very happy.
Some time ago my Dad worked some copper pipe on his lathe for me to turn into bracelets. The first couple attempts didn't turn out so good but I kept the rejects figuring I eventually do something with them. It's eventually. As you can see the pipe was lopsided and dented. The Knurling was pretty deep and uneven.


I used my Dad made grinding wheel to knock off as much of the knurling as I could.


The center was cut too deep for me to get it totally clean but I kept working at it. After using the grinding wheel I worked at it with files and was able to knock off some more of the texture. I got it as clean as I could and decided to work with the marks that were left. I annealed it and marked it for forming.

I used my new stakes and hammers to reshape the metal.


Then I used my saw to open the tube into a cuff and rounded off the open edges with a file. I liked what I had. It was simple but eye catching.


Monday, January 2, 2012
Another New Year
Some people may think I'm unusual but like so many other people I do use the start of a new year to make good intentioned changes and finish old projects. Doesn't mean that it always sticks but some things are just tradition.
I recently inherited a bunch of sewing stuff so in addition to cleaning my work area I had to find room for the new stuff I brought in. To start I had to clear a space to fit an awesome sewing table built by my Dad. He's a thoughtful craftsman and built this table with a recess to fit the sewing machine. It makes a nice 4 foot square work surface. That gives me plenty of work room and enough extra room for my other two machines. I can just pull them forward when I want to use them.

Making room for the table, in my usual method, I made a mess on top of the mess I already had. One thing besides making messes that I'm good at doing is finding room for new things and throwing away things I don't use.

Isn't this a great table? I did have to have help from my brother and his boys to get it from the upstairs at my fathers to the basement of my home. Thank you brother and nephews!!

Dad even attached an electrical outlet to the side of the table so I don't have to crawl under it to plug everything in. In this case my nephew earned that chore (plugging in).


This table was piled high with sewing, soldering and forming supplies. I did take a before picture but it wasn't in focus. The hanging bar clock belongs to my oldest son. I'll be glad when he finally settles somewhere and can take it home with him.

This is another Dad built table. It's taller than a normal table and wide so I can lay out material. It also has extra support attached to the underside to stand up to heavy use. It's my everything table. I cut material, hammer and solder metal, cut glass, paint, work polymer clay, do lampwork and nearly everything else on this table.

Even though I didn't have to move my jewelers bench I did clean it off. I find that the more I work the smaller my work space gets until there isn't a clear space left. This table really needed cleaning.

Here's where I do my beading. Not very clean and never is. I usually have several projects going and plunked various areas on the table. You can see a few strands of beads and a container of mixed beads. Since I took this picture I did put the book away and finish the necklace I was stringing. It was a simple necklace, just a lot of mixed seed beads strung on 3 long lines, then braided. One of those mindless kind of projects. Next to the beading station you can see a TV. It's a great place to watch jewelry DVD's and programs such as Project Runway and Project Accessory. I also really like the DIY home design programs.

That's my start of 2012 story. Always the hope that the new year will bring inspiration and the time to follow it through.
I recently inherited a bunch of sewing stuff so in addition to cleaning my work area I had to find room for the new stuff I brought in. To start I had to clear a space to fit an awesome sewing table built by my Dad. He's a thoughtful craftsman and built this table with a recess to fit the sewing machine. It makes a nice 4 foot square work surface. That gives me plenty of work room and enough extra room for my other two machines. I can just pull them forward when I want to use them.

Making room for the table, in my usual method, I made a mess on top of the mess I already had. One thing besides making messes that I'm good at doing is finding room for new things and throwing away things I don't use.

Isn't this a great table? I did have to have help from my brother and his boys to get it from the upstairs at my fathers to the basement of my home. Thank you brother and nephews!!

Dad even attached an electrical outlet to the side of the table so I don't have to crawl under it to plug everything in. In this case my nephew earned that chore (plugging in).


This table was piled high with sewing, soldering and forming supplies. I did take a before picture but it wasn't in focus. The hanging bar clock belongs to my oldest son. I'll be glad when he finally settles somewhere and can take it home with him.

This is another Dad built table. It's taller than a normal table and wide so I can lay out material. It also has extra support attached to the underside to stand up to heavy use. It's my everything table. I cut material, hammer and solder metal, cut glass, paint, work polymer clay, do lampwork and nearly everything else on this table.

Even though I didn't have to move my jewelers bench I did clean it off. I find that the more I work the smaller my work space gets until there isn't a clear space left. This table really needed cleaning.

Here's where I do my beading. Not very clean and never is. I usually have several projects going and plunked various areas on the table. You can see a few strands of beads and a container of mixed beads. Since I took this picture I did put the book away and finish the necklace I was stringing. It was a simple necklace, just a lot of mixed seed beads strung on 3 long lines, then braided. One of those mindless kind of projects. Next to the beading station you can see a TV. It's a great place to watch jewelry DVD's and programs such as Project Runway and Project Accessory. I also really like the DIY home design programs.

That's my start of 2012 story. Always the hope that the new year will bring inspiration and the time to follow it through.
Sunday, November 20, 2011
2011 Christmas
It's been a long time since I've posted and I've been busy. I've participated in a few art shows and added new items to my shop. I've been hard at work up-dating photos and have initiated a coupon sale and free shipping for the Christmas 2011 season. There are still a few photos to update but I didn't want to wait before starting the sale.
From now until December 20, 2011 I'm offering free priority shipping in the lower 48 states and 20% off on selected items. Shop and enjoy.
From now until December 20, 2011 I'm offering free priority shipping in the lower 48 states and 20% off on selected items. Shop and enjoy.
Friday, September 2, 2011
Croatian Picnic and Art Show
Sunday, September 4, 2011 I will have a booth at the Art Show in Benld, Illinois City Park. The Art Show is in conjunction with the Croatian picnic. Ethnic music, dance and food will be featured at the picnic. If you have any questions please feel free to contact me at llrodenjewelry@gmail.com.
Sunday, July 24, 2011
Successful Experiment
I've been running an idea around in my head for a while and finally gave it a shot. I bought a new bead loom almost a year ago and it was still in the box. I put the loom together and warped it a little different than usual for a bead loom.
 I knew I wanted to make a bracelet so I started with a ladder stitch 12 cube beads long and 2 beads high for each end of the bracelet. The length of the loom is 7" so that is just about the right size for a bracelet. I attached the ladder stitched ends to the loom. By doing the ends like this I didn't have a bunch of warp thread to deal with when I was finished.
 I warped the loom with a very long piece of 8 pound smoke fire line. I attached the line to the loom in the usual way by attaching it to the body of the loom. With a #12 needle on one end of the line I ran the line through the first row of cube beads. Then I broke out the container of mixed beads that has grown with every project I've done in the past.

I strung random beads on the line until it was long enough to attach to the other set of ladder stitched cube beads. I ran the line through the corresponding set of cube beads on the far end of the loom. I tied a knot around the line running through the cube beads and ran it back down through the next set of cubes. Again I strung random beads until I reached the other end, knotting each time and pulling the line snug. That was repeated until I had a line for each set of 2 cubes.

Since I started with a very long length of line I knotted the line next to the last set of cube beads and was able to continue stringing beads for the weft of the loom. This time I used only seed beads on the line and kept stringing beads until I had enough to go back and forth across the bracelet several times. Instead of the usual beaded loom work of beads fitted between each line I decided to weave over and under the warp line like I was weaving material.

I worked each weft line as close to previous row as I could. The warp lines had big, little and tube beads that made the texture very random. I really like the look of the weave.

Once I finished the weaving I cut the cube beads loose from the loom. Goofed a little there and managed to cut a couple of the warp lines. Had to do a quick repair and restring a few beads and tie them off.
I hadn't really thought this all the way through since it was an experiment. It was time to figure out the clasp. The first clasp I tried was sterling silver wire worked through the last two cubes on both sides of the bracelet. To anchor them I made a swirl on the ends and wire wrapped the wires together for strength. The clasp was a piece of hammered sterling bent into a hook. I hated it when it was finished.

The "well duh" moment came when I walked away for a while. Time to fall back on the very versatile peyote stitch. On one end of the bracelet I attached seed beads two at a time across the end of the cubes by running the line back and forth through the cubes. From there I worked in peyote stitch to make a tab with an opening for a button. On the other end of the bracelet I again attached beads and stitched a plain tab. I ran the line back through the beads on the tab for strength and attached a button I found in my button stash that is almost as bad as my bead stash. Viola!!!! A closure I liked.


 The whole thing took about 18 hours including the repairs and sterling clasp and replacement.


I strung random beads on the line until it was long enough to attach to the other set of ladder stitched cube beads. I ran the line through the corresponding set of cube beads on the far end of the loom. I tied a knot around the line running through the cube beads and ran it back down through the next set of cubes. Again I strung random beads until I reached the other end, knotting each time and pulling the line snug. That was repeated until I had a line for each set of 2 cubes.

Since I started with a very long length of line I knotted the line next to the last set of cube beads and was able to continue stringing beads for the weft of the loom. This time I used only seed beads on the line and kept stringing beads until I had enough to go back and forth across the bracelet several times. Instead of the usual beaded loom work of beads fitted between each line I decided to weave over and under the warp line like I was weaving material.

I worked each weft line as close to previous row as I could. The warp lines had big, little and tube beads that made the texture very random. I really like the look of the weave.

I hadn't really thought this all the way through since it was an experiment. It was time to figure out the clasp. The first clasp I tried was sterling silver wire worked through the last two cubes on both sides of the bracelet. To anchor them I made a swirl on the ends and wire wrapped the wires together for strength. The clasp was a piece of hammered sterling bent into a hook. I hated it when it was finished.
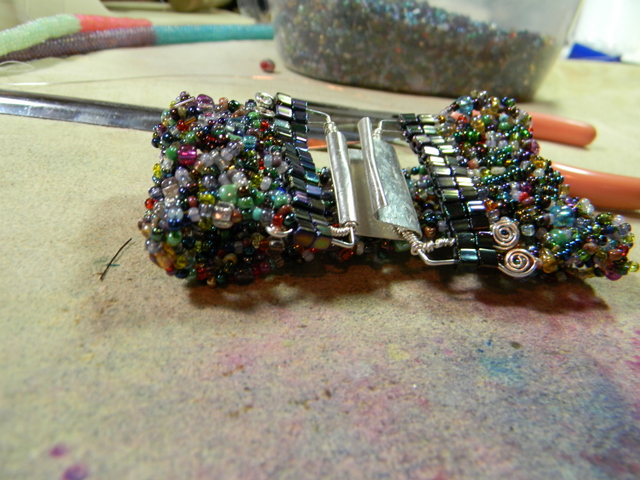
The "well duh" moment came when I walked away for a while. Time to fall back on the very versatile peyote stitch. On one end of the bracelet I attached seed beads two at a time across the end of the cubes by running the line back and forth through the cubes. From there I worked in peyote stitch to make a tab with an opening for a button. On the other end of the bracelet I again attached beads and stitched a plain tab. I ran the line back through the beads on the tab for strength and attached a button I found in my button stash that is almost as bad as my bead stash. Viola!!!! A closure I liked.


Thursday, July 14, 2011
Upcoming Events
Fall Art Fairs are coming soon. So far I've registered for two. The first fair is Labor Day Sunday, September 4, at Benld Park in Benld Illinois. This fair is part of the annual Croation picnic.
The second fair is the Staunton Art Fair in Staunton, Illinois. That fair is at Duda Park and for the two days of September 24 and 25.
I've been working hard to get many new items made for fall fairs. If you're out and about, looking for something to do please stop by one or both of the fairs.
The second fair is the Staunton Art Fair in Staunton, Illinois. That fair is at Duda Park and for the two days of September 24 and 25.
I've been working hard to get many new items made for fall fairs. If you're out and about, looking for something to do please stop by one or both of the fairs.
Friday, June 17, 2011
Christmas In July
ArtFire Christmas in July. Beginning July 1, 2011 and ending July 31, 2011 many shops on ArtFire will be having Christmas in July, myself included. During July every item in my shop will be 20% off. Hope you can join us.
Thursday, June 16, 2011
Crazy Month
This month has been totally crazy. Started out sick and in no mood to visit my jewelry cave. Then I had a day long meeting out of town for DAR the first Saturday of the month. The next Saturday was the vendor/craft fair. Now I'm busy getting costumes ready for a Women's Veterans parade in Mt. Vernon, IL, this Saturday.
We will have a float in the parade and have several women veterans that have volunteered to ride the float. Some of them don't have period costumes so a few of us have been busy getting costumes made for them.
At the end of the parade there will be a dedication ceremony for a statue representing women veterans from the Revolutionary War to Present Day. I've got my camera ready to go and hope to get a lot of pictures to post and remember this day.
Next weekend I'll be cleaning a house I haven't touched in a while. We'll have several family members visiting from out of town for the July 4th weekend. There is a flag dedication in Godfrey July 1st. Then the rest of the weekend is going to be spent sight seeing.
Once July comes around it will seem strange not to be running every weekend. I'm looking forward to it. There are several new to me jewelry lessons I want to try. All the stuff I've been thinking of trying has been put on the back burner while all this other stuff is going on.
We will have a float in the parade and have several women veterans that have volunteered to ride the float. Some of them don't have period costumes so a few of us have been busy getting costumes made for them.
At the end of the parade there will be a dedication ceremony for a statue representing women veterans from the Revolutionary War to Present Day. I've got my camera ready to go and hope to get a lot of pictures to post and remember this day.
Next weekend I'll be cleaning a house I haven't touched in a while. We'll have several family members visiting from out of town for the July 4th weekend. There is a flag dedication in Godfrey July 1st. Then the rest of the weekend is going to be spent sight seeing.
Once July comes around it will seem strange not to be running every weekend. I'm looking forward to it. There are several new to me jewelry lessons I want to try. All the stuff I've been thinking of trying has been put on the back burner while all this other stuff is going on.
Monday, May 9, 2011
Benefit Fair
On June 11, 2011 I will be participating in a benefit craft and vendor fair. Hope you can be there. Details below.


Sunday, May 1, 2011
Sea Side Complete
After all that work drawing on the large shell I decided not to use it. I dug through my stash and picked out other shells to color. All the shells were from the bunch Jeremy picked up on the beach.

The colored pencils are great. After coloring I used the blending pen and then sprayed them with fixative. The fixative gave the shells a shine that I really like and the combination of shine and color helped me decide which beads to use and how to complete the necklace.


I have a plastic bowl full a various seed beads in all kinds of colors and sizes. I decided to make a spiral rope with random colors and larger shinny beads in the outside sections. I used 8 lb smoke fire line to stitch it all together. A spiral rope means several passes through the beads so the necklace is extra sturdy. I used wire guards and ran the fire line several passes through the guards and back through the ends of the necklace then closed it with snap clasps.

Once the base was complete it was time to attach the shells. I ran the needle back through the necklace, strung a few seed beads, a shell and a few more beads and took it back to the base each time. An extra knot after every shell helps hold them in place. Now I'll have to wear test it to make sure the color stays on the shells.

It sounds like a shell wind chime when I move. I love it. Now I'll need to get more shells.

The colored pencils are great. After coloring I used the blending pen and then sprayed them with fixative. The fixative gave the shells a shine that I really like and the combination of shine and color helped me decide which beads to use and how to complete the necklace.


I have a plastic bowl full a various seed beads in all kinds of colors and sizes. I decided to make a spiral rope with random colors and larger shinny beads in the outside sections. I used 8 lb smoke fire line to stitch it all together. A spiral rope means several passes through the beads so the necklace is extra sturdy. I used wire guards and ran the fire line several passes through the guards and back through the ends of the necklace then closed it with snap clasps.

Once the base was complete it was time to attach the shells. I ran the needle back through the necklace, strung a few seed beads, a shell and a few more beads and took it back to the base each time. An extra knot after every shell helps hold them in place. Now I'll have to wear test it to make sure the color stays on the shells.

It sounds like a shell wind chime when I move. I love it. Now I'll need to get more shells.
Tuesday, April 26, 2011
Sea Side
Some time ago my Florida son gave me a bunch of sea shells. I haven't totally decided what to do with them but I've been tossing around some ideas. I want to make a SEA based necklace so follow along as I make it and probably make mistakes.
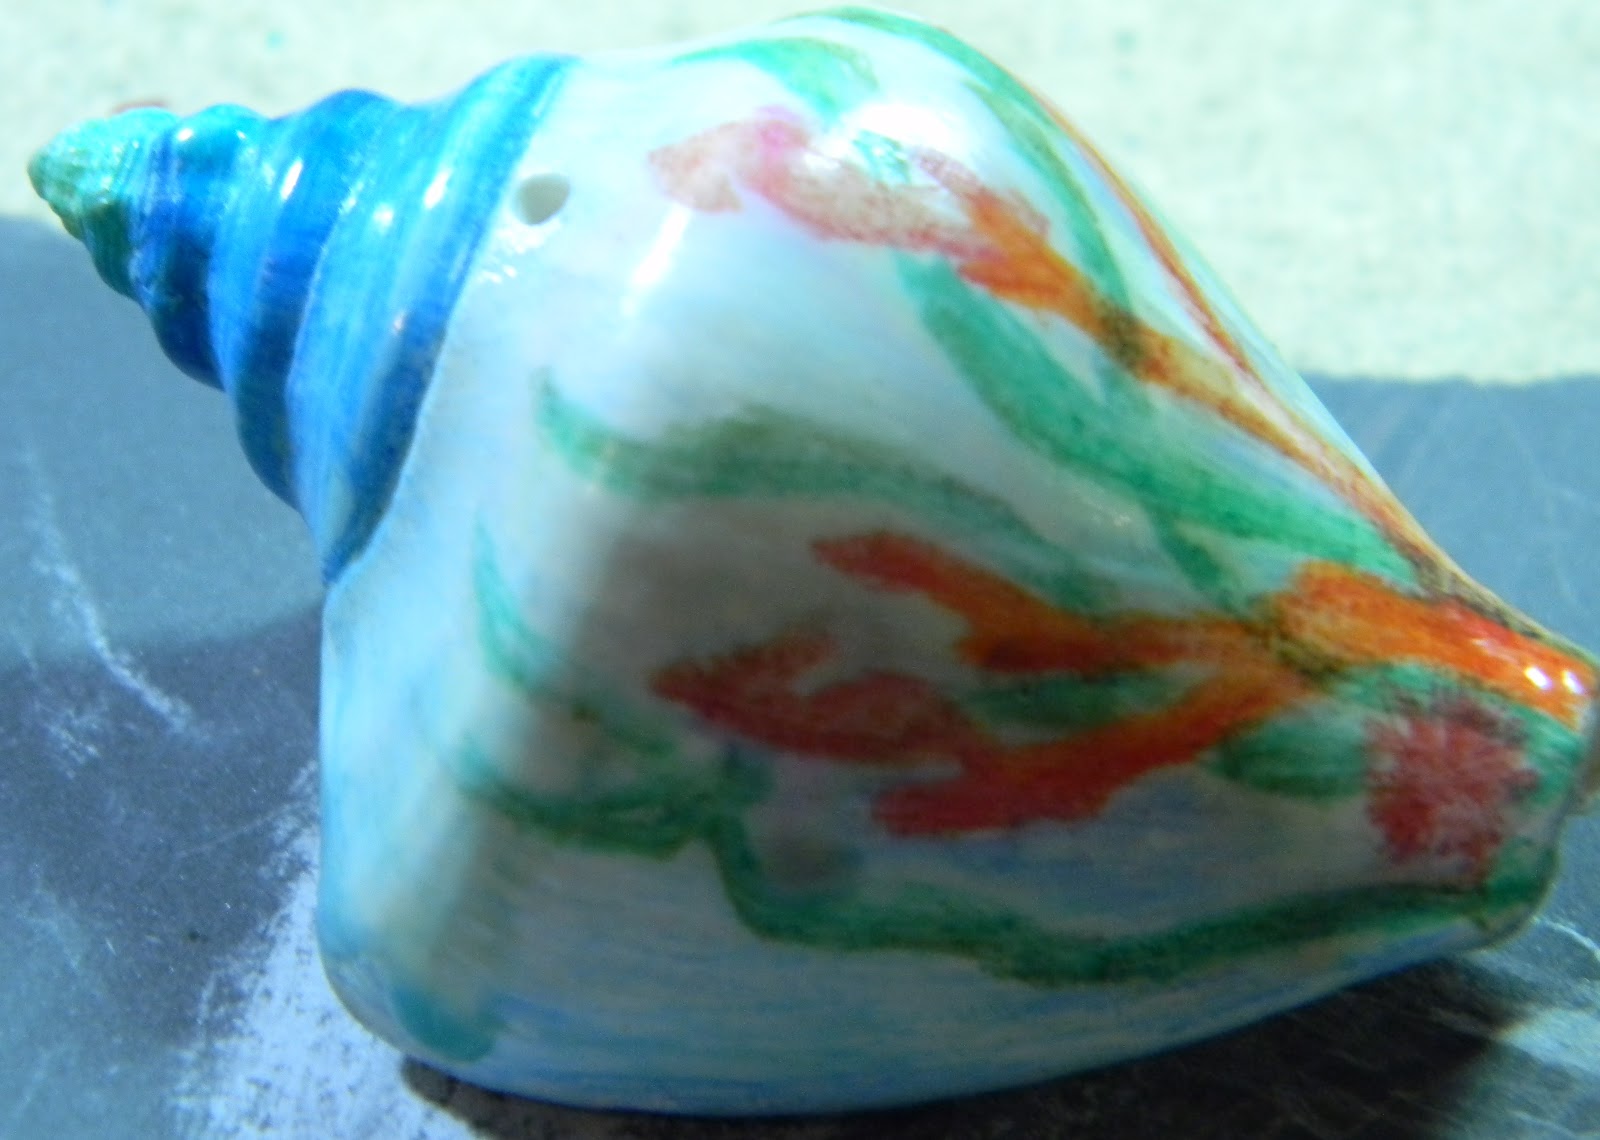
I started out with a plain white sea shell. I drilled a hole through the back for an attachment spot. Not sure I'm going to need it but wanted it there just in case.

 After drilling the hole I lightly sanded the shell with fine sand paper so I would have a good surface for drawing. I didn't want this to be any old regular white sea shell. I cleaned it with glass cleaner then got out the colored pencils and started drawing.
Now the shell is covered with a blue background, red coral, green sea weed, a couple of star fish, sea horses and sea urchins.


 Once that was all done I sprayed it with fixative and will let it dry until I can get back to the basement and back to work constructing the necklace. I have other shells to add and may add some metal charms as well as seed beads. I've got a few ideas. We'll see how it works.
I started out with a plain white sea shell. I drilled a hole through the back for an attachment spot. Not sure I'm going to need it but wanted it there just in case.


Now the shell is covered with a blue background, red coral, green sea weed, a couple of star fish, sea horses and sea urchins.


Subscribe to:
Posts (Atom)