Sunday, January 9, 2011

Think I'll Do Another


The picture frame is finished and it was so much fun I'll do a couple more but this time to sell.  Every time I do something new I learn a little more.  With this one I started out on foil for easy clean up and to protect my work surface from paint and glue.  It sounded like a good idea but the reflections from the foil make it hard to see the work.  It also makes the photos difficult.

Below is a shot of the frame with the beads glued to the front.  Like I said before the glue smell is so strong I could only work on it for short periods.  Once all the beads and glue were dry on front I trimmed the strings and overhanging beads.  I found out that using a hot fabric burner with a small tip is a great way to cut and finish the strings and burn away dried glue that was in the wrong spot.

I glued lines of beads around the inside and outside edges.  After all that I went back and used clear Elmer's glue to fill holes where beads didn't stick or I needed to fill small spaces where I couldn't attach beads still on the string.


Below is the frame with all the beads attached.  The opening in the frame is 4 x 6 and it starts out as a plain pine frame I bought at Michael's.  The strings of beads were made in India and also bought at Michael's a couple years ago.  They are fairly crude and uneven in size and color. The crosses and chunks of glass are from Fire Mountain Gems and Beads. The carved coral rose at the top to the top cross is also from Michael's.  The turquoise skull is from a sting I bought at a bead show in Memphis.

Now that the frame is done it's Bob's job to find a picture he wants to put it in and find a place to put it in his "shrine".


Included below are pictures of the other items in the shrine.  The shrine started with just the Our Lady of Guadalupe candle in the center of this picture.  The other candles were gifts or purchased from various places around town.


Like I said before, Bob has a thing from the Sacred Heart.  He picked up this picture just last week.


The heart and mirror are from a shop in a small Texas town.  The ornament hanging from the mirror is a recent gift from our best friends.


Don't know where he got this, I think from that same shop in Texas.


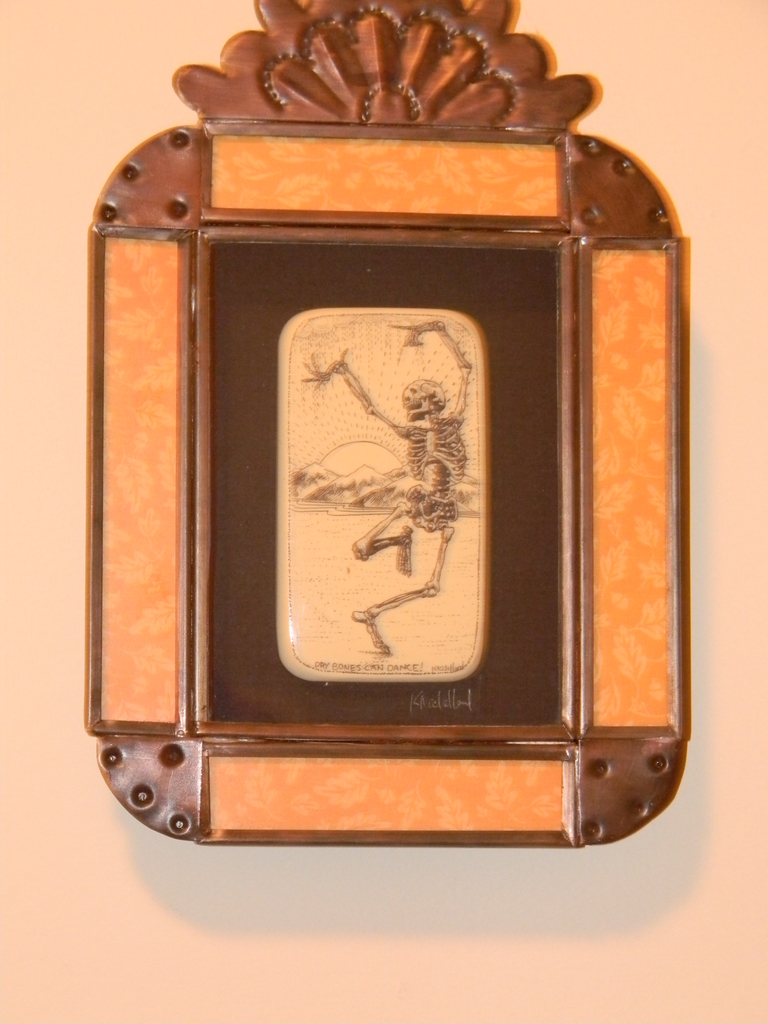
This is piece of bone with an ink drawing of a dancing skeleton in a shadow box frame.  He picked this up in Florida.


The candles below I couldn't resist.  I purchased them from, Vicki Berndt, a seller on Etsy.  They were a surprise Christmas gift.


Thursday, January 6, 2011

Shrine

For anyone that has been to my house you know that we are a little strange.  You could say we have a somewhat warped sense of humor.   With that in mind you wouldn't be surprised to see my husband's shrine in our downstairs bathroom.

It's just one of those things that started as being silly with one simple item and grew from there.  He has a fondness for Sacred Hearts and Day Of the Dead stuff.  Besides the things he's bought, friends have also given gifts to add to the shrine.  Now I'm adding to his shrine with a beaded picture frame.

 I started with a simple plain pine frame and painted it flat grey to seal the surface and provide a good bond for the glue.
 

I'm using contact glue to attach the beads and can only work for short periods without getting a headache from the smell.  I started by wiring a turquoise skull to the bottom of a primitive glass cross and a small, pink, carved, coral rose to the top of the cross.  That was glued to the top center of the frame.  Then I glued on various bits and pieces of colorful glass chunks to the bottom of the frame.  There was no pattern in mind, I just stuck on what fit.  That was all I could do the first day.


Tonight I started by gluing on a couple more crosses and then strings of beads.  I'm using heavy toothpicks to push the beads into place so I don't get so much glue on my fingers.  Still stuck my fingers to it but it could have been worse.  Didn't get too far with it before having to leave the basement and get away from the glue.   Gluing on the beads means my nose is really close to the work and the smell is really strong.


Stay tuned for more.

Sunday, December 26, 2010

Ideas!

Started out today cleaning my basement/studio.  After scrambling to get Christmas gifts made and other presents wrapped my basement looked like a bomb went off.  Now it's reasonably neat and again a comfortable place for me to work.  I can put up with the mess for a while but then it begins to get to me and I can't concentrate on any thing.

Once every thing was in order and the shop vacuum used I sat down at my beading desk and went brain dead.  I usually have a gazillion ideas running around in my head but not today.  Then I got the bright idea to go through my beading/jewelry magazines.  I decided that when I came to a design I like, that I haven't tried before, I'd use that design for inspiration.  I say inspiration because just like my cooking and sewing I view the directions as suggestions.

Usually I'll go through a stack of magazines and mark what I'm interested in trying but then I'd move on, flipping pages and marking.  A lot of times I'd have a stack of marked magazines and never get back to the article.   This time I'm stopping when I see something and using the article, complete a project before moving on to another design.  So far it's working and I've made a new bracelet and earrings.

During this past year I've purchased several tools/beads/findings that I haven't used - yet.  I'm looking at this as the start of a new year and new ideas.  I hope to be able to complete a lot more projects without buying a bunch of new stuff.  Believe that?  Me either!  But I'm going to try.

Friday, December 24, 2010

Merry Christmas

More room to write here than Facebook.

It's a winter wonderland out side.  Everything covered in white and beautiful.  Spent the day making goodies for tomorrow's Christmas party at my niece Jeanne's.

Made a very simple candy treat from a recipe I got at work.  Simple, the best kind.  You mash up a package of Oreo cookies, mix in 8 oz of softened cream cheese, form it into balls and chill till firm.  Once they're firm you cover them in melted chocolate.  So simple but so good.

After that I got the bright idea to use gingerbread graham crackers for the filling.  Since they don't have the filling of Oreos they were a little dry.  Solved that by melting a stick of butter and added that to the mixture along with about 1/4 cup sugar and 1 teaspoon ground cloves.  Of course keeping it real simple I did all the mixing in the food processor.  YUM. 

For the final item I made 2 cheese cakes.  These were at the request of my nephew, Nick.  I hear they're his favorite but we all seem to like them.  I also made fruit salsa to top the cheese cake if desired or just to eat with graham crackers.

Took a few minutes to finish wrapping the gifts for tomorrow.  Now all that's left to do is get there.  I'm really looking forward to seeing everyone.  My favorite part of Christmas is visiting with family that I love but don't get to see as often as I'd like. 

Sunday, December 19, 2010

Gem Stone Watch

This was a very productive weekend.  Below you can see the process of assembling a two strand gemstone bracelet watch.  Not a whole lot of description here.  I strung two strands of gemstones on flexible beading wire and attached them to a pre-made watch face.


Simple Dangle Earrings

A friend mentioned that she'd really like to have some earring made from Rose Quartz.  That got me digging out my supply of rose quartz and making several pairs of earrings.  Here's the process for making a pair of simple dangle earrings.  I've found out that it's really tricky photographing the process while doing the work.  Since I was photographing as I go you'll also get to see my messy work area in the background.

Below is some of my rose quartz stash.  I have finished nuggets, chips - large & small and various other shapes.


 To make earrings you need earring findings as well as the pretty stones or beads.  For these earrings I'll use silver head pins and silver ball post earrings with a loop for attaching the earrings.  I've also used some silver, flower shaped bead caps and tiny silver spacer beads.  To attach the earrings to the post you'll need a couple split jump rings.


 To begin I added the following things to the head pin.  1 silver ball, 1 bead cap, 1 large faceted quartz nugget, 1 bead cap, 1 small silver ball, 1 small faceted quartz nugget and finally another silver ball.


Once everything is on the head pin I used my chain nose pliers to  make a 90 degree bend in the head pin.


 Then I used my round nose pliers to make a loop in the head pin.


After making the loop I used my bent nose pliers to hold the loop so I could use my chain nose pliers to make wrapped loops with the remaining wire of the head pin.  Carefully make the loops parallel and tight to each other.


After several wraps use wire cutters to trim the remaining wire close to the wraps and press the end down tight to the head pin.


To attach the earring to the ball post open a jump ring and slip on the earring and the loop of the ball post.  I use the smallest jump ring possible that will still allow some movement of the earring.  To open and close jump rings use two pairs of pliers, one on either side of the opening of the jump ring, and use a back and forth motion instead of pulling the opening of the ring apart.  Make sure to close the jump ring so there is no gap.


Repeat the process to make the second earring.  Simple and easy!

Saturday, December 4, 2010

Random Glass Necklace part 2

 All the parts are completed and ready to connect.


To build the necklace I used 6mm jump rings to connect 1 bead with a wrapped loop on each end, 3 headpin dangles and 1 bead with wrapped loops.  Continue adding wrap loop beads alternating with 3 dangle units  until all units are attached.  I don't put dangles at the clasp ends of the necklace.


 Here's the necklace with everything except the clasp attached.  I used a small snap/button type clasp for a closure and soldered all the jump rings closed.  That's easier said than done since the beads keep wanting to get in the way of the soldering iron.  I used Stay Brite solder and flux with a low temp soldering iron.


Here's the necklace with the clasp attached, the jump rings soldered and everything cleaned.


Now I'll have to take another jewelry break to do some sewing.  I promised my granddaughter, Emily, that I'd make a Christmas dress with snowflakes.  Yes this is the same granddaughter that got the Glenda costume for Halloween.  And yes she has me wrapped around her little finger.

In case you missed seeing her completed costume here is another picture.