Tuesday, October 26, 2010

Final Phase

Finally done!  In this picture the background beading is finished and the foundation material needs to be trimmed close to the edge of the beading.  Notice I said close.  Actually you need to leave some material around the edge to keep the beaded areas from pulling out if you cut too close.  I usually leave about 1/4 inch around the outside.


I learned a lesson from the first bracelet I made.  I sold it to a friend and while she was wearing it in New Orleans, someone grabbed it right off her wrist.  Now when I make these bracelets I sandwich a loop of vinyl coated beading wire between the front and back layers of material.  I run the wire through the closures so the wire and hooks take all the stress of wear and make it a lot more secure.  For this bracelet I used heavy duty black hook and eye closures.  You can see the wire at the bottom of this photo.  I knew I wanted the bracelet to fit a 7 1/2 inch wrist so the wire is measured to a little over double that length and secured with crimp beads.  I used crimp beads just below each end and again in the center.


Here's the bracelet with the material trimmed and the center moon face embellished with clear crystal tear-drop beads and alternating with crystal bi-cones.  See the smudges on the surface of the faces?  I use smoke Fireline to sew on the beads.  The finish on the Fireline comes off on your hands and in the process gets on the polymer faces.  It took a light sanding to get the faces back in shape.


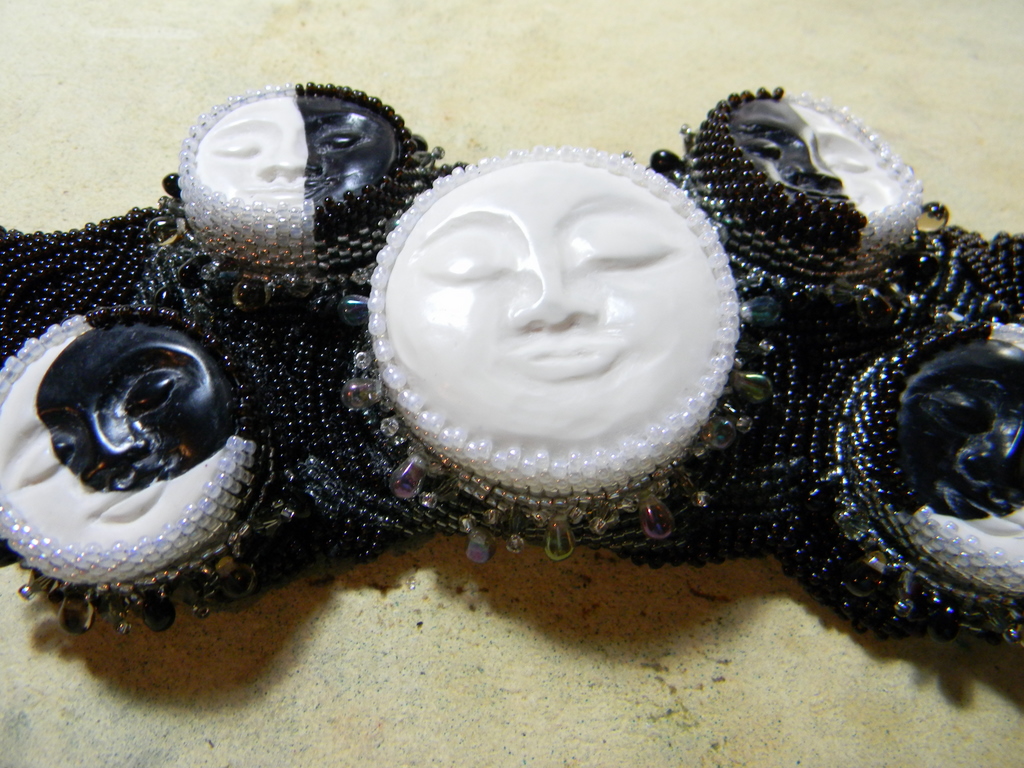
The smaller moon faces are embellished with black and smoke color tear-drop beads alternated with crystal and ab crystal bi-cones.  The embellishment on the smaller faces doesn't encircle the entire face.  I wanted the main accent to be on the center face.


I've attached another layer of black ultra suede to the back of the bracelet to enclose the wire support and to hide all the beading stitches.  I stitched the two layers of material together with a running stitch to hold it in place while I beaded around the edges.  By stitching close to the edges I could hide the running stitches with the beaded edge.


Here's the completed bracelet all cleaned up and ready to go.  I finished the surface of the faces with micro-crystalline wax.  The wax goes on wet but drys quick.  Once it's dry it buffs to a nice soft shine and provides a protective coating to the jewelry.


Monday, October 18, 2010

Lastest Phase

I didn't get as far as I had hoped this weekend.  Hopefully I'll have enough time in the evenings during the week to get most of the front done.  Between the time I did have on the weekend and the hour and a half I had this evening I did get a little bit done.


You can see the background building up a little bit.  The beads are added two at a time and back-stitched for extra security.  As the beads are added the bracelet begins to curve.  It also makes it a little easier to stitch because it doesn't flop around as much.  With the black back ground it's hard to see just how many beads have been added.  Once all the beads are put in place the extra material will be trimmed from the sides and a backing attached.

Saturday, October 16, 2010

Advancing Moon Phases

The phases have their peyote stitched bezels.  The full moon is stitched with silver lined crystal beads at the base and white seed beads at the top. The waxing and waning phases are stitched with silver lined gray beads on the white side and silver lined black beads on the black side.  The tops are white and black beads.


After stitching around the faces the stiff backing was trimmed and the faces were attached to the black backing material that makes up the base of the bracelet.  The base will be fully stitched with beads.  A few rounds have been stitched and I hope to finish up the beading tomorrow.


There is more material here than will be in the finished bracelet.  I've found out from experience that the material tends to draw up as you stitch so I left some extra around the edges.  When it's fully stitched it will measure about 7 inches long.

Sunday, October 10, 2010

The New Other Thing

I'm making another "face" bracelet.  This one will be phases of the moon.  I made the faces a few days ago in expectation of taking them with me to work on while we were making our Kentucky Halloween costume delivery and sitting in the hotel room Saturday night.  Unfortunately I didn't have the needle I needed but come to find out it didn't matter because we were baby sitting Saturday instead of sitting in the hotel.  Not so unfortunate after all.

We're back home now and I've begun the beading around the faces.  This is just the start and again I'll be posting updates as they become available.


My plan is to use various shades of silver, white and black beads corresponding with the color of the section of the face I'm working around.  I want the full moon to kind of glow and really stand out in the center of the bracelet.  The other faces will be worked with white and black beads, depending on which side of the bead is black or white, I think you get the idea.

Watch this space to see if what's in my head really works out.  I'm frequently working around happy accidents.

Glenda arrives

We were able to deliver the Glenda costume this weekend and luckily it fit.  Emily was thrilled.  I think she liked the high-heel shoes as much as she likes the costume but all in all I'm so glad she did like it and that it fit.  I also made pants and bought a t-shirt for her friend Bryce so he can dress as Shaggy from the cartoon, Scooby Doo. 


Notice the high-heel shoes and crown make Emily as tall as Bryce.  She noticed that right away.  This grandma certainly needs to improve her camera skills and I'm trying.

Now the costumes are put away to wait for Halloween and I'm on to other projects.

Saturday, October 2, 2010

Considering Glenda

There's an old saying in my family; "Considering what it is and who it's for, that's good enough".  In that case, considering this is a Halloween costume for a 6 year old, this is good enough.  It's finally as complete as it's going to get.

I'll be repeating myself with some of the description but here goes.

The dress is pink costume satin with tulle sleeve caps, bodice decoration and two layers of tulle on the skirt.  The stars and dots are glitter glue or paint.  Once all the paint and glue was dry I added a few stick-on rhinestones to the center front for some extra bling.


You can see the wand at the side of the picture.  It is made from two layers of glow in the dark polymer clay and decorated with glitter glue and red glass "jewels".  The handle is a dowel rod that was painted with gray paint and glitter paint for a second coat.  It's about 3 1/2 feet long, so just about as tall as Emily.

Here's a closer look at the top of the wand.  It really does glow in the dark.


Last but not least - actually the crowning glory is the crown.  It is made from the satin left over from the dress.  I covered that with 8 layers of Mod Podge, 4 front and 4 back.  At each point is a bundle of paper coated floral wires, spiraled at top and bottom then glued to the crown.  When the glue dried I painted the wires with glitter glue and painted random dots of glitter on the surface of the crown.  On the top spirals I stuck some more rhinestones and the center front is also decorated with rhinestones.


Below is a closer look at the center front section of the crown.


This whole costume is a testament to Walmart and Michaels craft supplies.  Everything except the dowel rod for the wand came from either one of these stores.  This really was fun, even though it took a lot longer than I expected.