It's been a long time since I've posted and I've been busy. I've participated in a few art shows and added new items to my shop. I've been hard at work up-dating photos and have initiated a coupon sale and free shipping for the Christmas 2011 season. There are still a few photos to update but I didn't want to wait before starting the sale.
From now until December 20, 2011 I'm offering free priority shipping in the lower 48 states and 20% off on selected items. Shop and enjoy.
Sunday, November 20, 2011
Friday, September 2, 2011
Croatian Picnic and Art Show
Sunday, September 4, 2011 I will have a booth at the Art Show in Benld, Illinois City Park. The Art Show is in conjunction with the Croatian picnic. Ethnic music, dance and food will be featured at the picnic. If you have any questions please feel free to contact me at llrodenjewelry@gmail.com.
Sunday, July 24, 2011
Successful Experiment
I've been running an idea around in my head for a while and finally gave it a shot. I bought a new bead loom almost a year ago and it was still in the box. I put the loom together and warped it a little different than usual for a bead loom.
 I knew I wanted to make a bracelet so I started with a ladder stitch 12 cube beads long and 2 beads high for each end of the bracelet. The length of the loom is 7" so that is just about the right size for a bracelet. I attached the ladder stitched ends to the loom. By doing the ends like this I didn't have a bunch of warp thread to deal with when I was finished.
 I warped the loom with a very long piece of 8 pound smoke fire line. I attached the line to the loom in the usual way by attaching it to the body of the loom. With a #12 needle on one end of the line I ran the line through the first row of cube beads. Then I broke out the container of mixed beads that has grown with every project I've done in the past.

I strung random beads on the line until it was long enough to attach to the other set of ladder stitched cube beads. I ran the line through the corresponding set of cube beads on the far end of the loom. I tied a knot around the line running through the cube beads and ran it back down through the next set of cubes. Again I strung random beads until I reached the other end, knotting each time and pulling the line snug. That was repeated until I had a line for each set of 2 cubes.

Since I started with a very long length of line I knotted the line next to the last set of cube beads and was able to continue stringing beads for the weft of the loom. This time I used only seed beads on the line and kept stringing beads until I had enough to go back and forth across the bracelet several times. Instead of the usual beaded loom work of beads fitted between each line I decided to weave over and under the warp line like I was weaving material.

I worked each weft line as close to previous row as I could. The warp lines had big, little and tube beads that made the texture very random. I really like the look of the weave.

Once I finished the weaving I cut the cube beads loose from the loom. Goofed a little there and managed to cut a couple of the warp lines. Had to do a quick repair and restring a few beads and tie them off.
I hadn't really thought this all the way through since it was an experiment. It was time to figure out the clasp. The first clasp I tried was sterling silver wire worked through the last two cubes on both sides of the bracelet. To anchor them I made a swirl on the ends and wire wrapped the wires together for strength. The clasp was a piece of hammered sterling bent into a hook. I hated it when it was finished.

The "well duh" moment came when I walked away for a while. Time to fall back on the very versatile peyote stitch. On one end of the bracelet I attached seed beads two at a time across the end of the cubes by running the line back and forth through the cubes. From there I worked in peyote stitch to make a tab with an opening for a button. On the other end of the bracelet I again attached beads and stitched a plain tab. I ran the line back through the beads on the tab for strength and attached a button I found in my button stash that is almost as bad as my bead stash. Viola!!!! A closure I liked.


 The whole thing took about 18 hours including the repairs and sterling clasp and replacement.


I strung random beads on the line until it was long enough to attach to the other set of ladder stitched cube beads. I ran the line through the corresponding set of cube beads on the far end of the loom. I tied a knot around the line running through the cube beads and ran it back down through the next set of cubes. Again I strung random beads until I reached the other end, knotting each time and pulling the line snug. That was repeated until I had a line for each set of 2 cubes.

Since I started with a very long length of line I knotted the line next to the last set of cube beads and was able to continue stringing beads for the weft of the loom. This time I used only seed beads on the line and kept stringing beads until I had enough to go back and forth across the bracelet several times. Instead of the usual beaded loom work of beads fitted between each line I decided to weave over and under the warp line like I was weaving material.

I worked each weft line as close to previous row as I could. The warp lines had big, little and tube beads that made the texture very random. I really like the look of the weave.

I hadn't really thought this all the way through since it was an experiment. It was time to figure out the clasp. The first clasp I tried was sterling silver wire worked through the last two cubes on both sides of the bracelet. To anchor them I made a swirl on the ends and wire wrapped the wires together for strength. The clasp was a piece of hammered sterling bent into a hook. I hated it when it was finished.

The "well duh" moment came when I walked away for a while. Time to fall back on the very versatile peyote stitch. On one end of the bracelet I attached seed beads two at a time across the end of the cubes by running the line back and forth through the cubes. From there I worked in peyote stitch to make a tab with an opening for a button. On the other end of the bracelet I again attached beads and stitched a plain tab. I ran the line back through the beads on the tab for strength and attached a button I found in my button stash that is almost as bad as my bead stash. Viola!!!! A closure I liked.


Thursday, July 14, 2011
Upcoming Events
Fall Art Fairs are coming soon. So far I've registered for two. The first fair is Labor Day Sunday, September 4, at Benld Park in Benld Illinois. This fair is part of the annual Croation picnic.
The second fair is the Staunton Art Fair in Staunton, Illinois. That fair is at Duda Park and for the two days of September 24 and 25.
I've been working hard to get many new items made for fall fairs. If you're out and about, looking for something to do please stop by one or both of the fairs.
The second fair is the Staunton Art Fair in Staunton, Illinois. That fair is at Duda Park and for the two days of September 24 and 25.
I've been working hard to get many new items made for fall fairs. If you're out and about, looking for something to do please stop by one or both of the fairs.
Friday, June 17, 2011
Christmas In July
ArtFire Christmas in July. Beginning July 1, 2011 and ending July 31, 2011 many shops on ArtFire will be having Christmas in July, myself included. During July every item in my shop will be 20% off. Hope you can join us.
Thursday, June 16, 2011
Crazy Month
This month has been totally crazy. Started out sick and in no mood to visit my jewelry cave. Then I had a day long meeting out of town for DAR the first Saturday of the month. The next Saturday was the vendor/craft fair. Now I'm busy getting costumes ready for a Women's Veterans parade in Mt. Vernon, IL, this Saturday.
We will have a float in the parade and have several women veterans that have volunteered to ride the float. Some of them don't have period costumes so a few of us have been busy getting costumes made for them.
At the end of the parade there will be a dedication ceremony for a statue representing women veterans from the Revolutionary War to Present Day. I've got my camera ready to go and hope to get a lot of pictures to post and remember this day.
Next weekend I'll be cleaning a house I haven't touched in a while. We'll have several family members visiting from out of town for the July 4th weekend. There is a flag dedication in Godfrey July 1st. Then the rest of the weekend is going to be spent sight seeing.
Once July comes around it will seem strange not to be running every weekend. I'm looking forward to it. There are several new to me jewelry lessons I want to try. All the stuff I've been thinking of trying has been put on the back burner while all this other stuff is going on.
Monday, May 9, 2011
Benefit Fair
On June 11, 2011 I will be participating in a benefit craft and vendor fair. Hope you can be there. Details below.


Sunday, May 1, 2011
Sea Side Complete
After all that work drawing on the large shell I decided not to use it. I dug through my stash and picked out other shells to color. All the shells were from the bunch Jeremy picked up on the beach.

The colored pencils are great. After coloring I used the blending pen and then sprayed them with fixative. The fixative gave the shells a shine that I really like and the combination of shine and color helped me decide which beads to use and how to complete the necklace.


I have a plastic bowl full a various seed beads in all kinds of colors and sizes. I decided to make a spiral rope with random colors and larger shinny beads in the outside sections. I used 8 lb smoke fire line to stitch it all together. A spiral rope means several passes through the beads so the necklace is extra sturdy. I used wire guards and ran the fire line several passes through the guards and back through the ends of the necklace then closed it with snap clasps.

Once the base was complete it was time to attach the shells. I ran the needle back through the necklace, strung a few seed beads, a shell and a few more beads and took it back to the base each time. An extra knot after every shell helps hold them in place. Now I'll have to wear test it to make sure the color stays on the shells.

It sounds like a shell wind chime when I move. I love it. Now I'll need to get more shells.
Tuesday, April 26, 2011
Sea Side
Some time ago my Florida son gave me a bunch of sea shells. I haven't totally decided what to do with them but I've been tossing around some ideas. I want to make a SEA based necklace so follow along as I make it and probably make mistakes.
I started out with a plain white sea shell. I drilled a hole through the back for an attachment spot. Not sure I'm going to need it but wanted it there just in case.

 After drilling the hole I lightly sanded the shell with fine sand paper so I would have a good surface for drawing. I didn't want this to be any old regular white sea shell. I cleaned it with glass cleaner then got out the colored pencils and started drawing.
Now the shell is covered with a blue background, red coral, green sea weed, a couple of star fish, sea horses and sea urchins.


 Once that was all done I sprayed it with fixative and will let it dry until I can get back to the basement and back to work constructing the necklace. I have other shells to add and may add some metal charms as well as seed beads. I've got a few ideas. We'll see how it works.
I started out with a plain white sea shell. I drilled a hole through the back for an attachment spot. Not sure I'm going to need it but wanted it there just in case.


Now the shell is covered with a blue background, red coral, green sea weed, a couple of star fish, sea horses and sea urchins.


Sunday, April 24, 2011
TA-DA
Finally got around to photographing my fused jewelry projects. Found out that's not so easy to do. Shinny flat pieces of glass tend to glare.
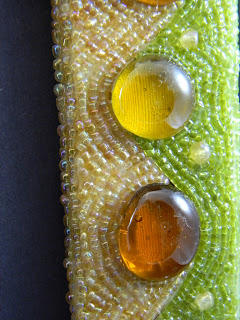
Most of the projects are pendents. There's one broach and three pairs of earrings. In case you don't know what fused glass is. You layer fusible glass, in this case small pieces, then fire them in a kiln till they melt together. It's interesting to see how the glass blends in the kiln. For the most part I like the interest of the bubbles in the glass but some people prefer no bubbles. I think it shows that's they're hand made. Bubbles tend to form in the spaces between the pieces of glass.


For a better look these will be gradually posted to my ArtFire store. Some of the photos didn't come out so good so I'll have to do them over again. I can certainly say I'm hooked on hot glass.
Of course fused glass isn't all I've been doing.
I've made a necklace loaded with flowers.

Then a spiral beaded blue and green necklace.

The color of that necklace got me on a blue and green kick and I love the cha-cha bracelets. So......

Since the weather has been so bad, this weekend, some of our plans got canceled. I really didn't mind because that gave me more time in the basement. I'm still working on my goal of learning new stuff. Last night I made a hammered copper cuff bracelet with turquoise and coral riveted to the front with copper wire.

And there you have it. My latest projects.
Tuesday, April 19, 2011
Busy, busy, busy
Last post I talked about attending a glass fusing class. I learned a few things from it and have been able to successfully fuse a few pieces on my own. I'll have pictures to post in a few days.
Many of you may know I work in an accounting office during the day and of course have been fairly busy there. That has all calmed down now that April 15th is past.
In addition to that I've been assigned the re-construction of our DAR chapter web site. I'm having a little trouble with google cooperation but the web site is coming together on my end. Not sure yet if I'll be able to use it because google has suspended the site and won't give me an answer as to why. If I can't get an answer before much longer I'll try a blog instead.
We're also preparing for our 100th anniversary in our DAR chapter and a lot of us are planning to construct revolutionary war period costumes. I just ordered 3 books with instructions, information and patterns. I have a period costume for the 1860's era but not 1776.
And of course I'm still making jewelry. Ain't life fun???
Friday, April 1, 2011
Just checking in.
I haven't blogged in a while I was feeling guilty. My granddaughter, Emily, snagged up the flower vine picture frame. Bob's tissue box cover is finished. I'm temporarily burned out on seed beads.
Tomorrow morning I'm attending a glass fusing class. I've done a little glass fusing on my own but figure it wouldn't hurt to see what I might be doing wrong. Besides I'll get to make a fussed glass necklace.
Now I'm ready to try some new stuff. Very glad to be finished, for now, with seed beads and glue.
Sunday, March 13, 2011
I've Been Framed
Here's a look at the rest of the beaded picture frames. This will be the last frames I do for a long time. I've enjoyed this but I'm ready to get back to making jewelry. I hope you enjoy this quick look.


Tuesday, March 1, 2011
Wrapped UP
I've been so wrapped up in beading new picture frames that I haven't taken the time to photograph or post any thing new for some time now. I have a few new frames finished and another one almost complete. I ran short on some of the beads and had to order more. They are supposed to be here by Friday. I hope to finish this weekend and will post the new pictures.
Sunday, January 23, 2011
More Picture Frames
I'm having too much fun with these things. I went to Michaels and stocked up on more blank frames and more hanks of beads. Got a few in different frame shapes too. The beads are Blue Moon beads and made in India. The sizes and shapes are very random but that makes for more interesting texture on the frames.
I keep learning as I go. I've found out it's easier and less stinky to use Aleen's Tacky Glue instead of contact glue. I've also learned that keeping baby wipes on hand is an easy way to get glue off my hands when I accidentally touch a spot I've just glued. The baby wipes are also great for going over the sections of beads and pressing on them to make sure they're all well stuck in the glue. The wipes help remove excess glue so I can see what I've missed and if the wipes are still wet the beads won't stick and pull beads out of place.
As much as possible I use the beads still on the strings and after sticking them in the glue, pull the string out. Another things I've learned is that if I'm not being careful I tend to drop the string of beads land get beads every where. (Can't walk and chew gum too well either) Attaching large beads and filling small areas with seed beads is still one bead at a time.
The frame below is shades of blue and grey. The picture area is offset from center with a larger area to the right of the picture. On that side I've used three graduated sizes of mirrors for accent. The lines of beads were purposely placed in wavy lines and kind of make me think of a pool of water. Since all the beads are odd shaped it would be impossible to get straight lines.

The frame below was almost too much fun. I had several small pieces of glass that I fused to play with color and didn't really have a plan for any of them. Those pieces of glass have been sitting around gathering dust. I put those pieces in a bag and whacked them with a hammer, then glued them to the frame like glass tile. Then I went back and filled open spaces with seed beads. The seed beads were left over from the first frame I made and I didn't worry about what color, just stuck them on as I went. The outside and inside edges were covered with randomly strung seed beads.

The frame below is a variation on the first one I made. It features crosses and chunks of colored glass. After gluing the beads to the front I put all the left overs in a bead spinner and strung them for sticking to the sides and inner edges.

I keep learning as I go. I've found out it's easier and less stinky to use Aleen's Tacky Glue instead of contact glue. I've also learned that keeping baby wipes on hand is an easy way to get glue off my hands when I accidentally touch a spot I've just glued. The baby wipes are also great for going over the sections of beads and pressing on them to make sure they're all well stuck in the glue. The wipes help remove excess glue so I can see what I've missed and if the wipes are still wet the beads won't stick and pull beads out of place.
As much as possible I use the beads still on the strings and after sticking them in the glue, pull the string out. Another things I've learned is that if I'm not being careful I tend to drop the string of beads land get beads every where. (Can't walk and chew gum too well either) Attaching large beads and filling small areas with seed beads is still one bead at a time.
The frame below is shades of blue and grey. The picture area is offset from center with a larger area to the right of the picture. On that side I've used three graduated sizes of mirrors for accent. The lines of beads were purposely placed in wavy lines and kind of make me think of a pool of water. Since all the beads are odd shaped it would be impossible to get straight lines.

The frame below was almost too much fun. I had several small pieces of glass that I fused to play with color and didn't really have a plan for any of them. Those pieces of glass have been sitting around gathering dust. I put those pieces in a bag and whacked them with a hammer, then glued them to the frame like glass tile. Then I went back and filled open spaces with seed beads. The seed beads were left over from the first frame I made and I didn't worry about what color, just stuck them on as I went. The outside and inside edges were covered with randomly strung seed beads.
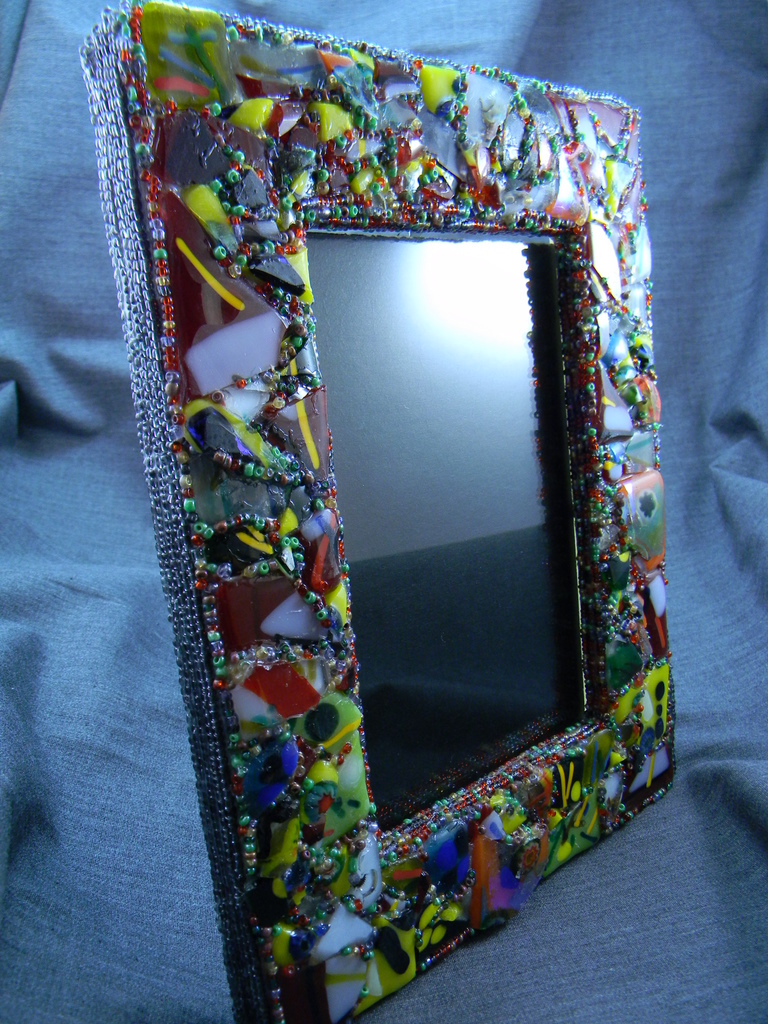
The frame below is a variation on the first one I made. It features crosses and chunks of colored glass. After gluing the beads to the front I put all the left overs in a bead spinner and strung them for sticking to the sides and inner edges.

Sunday, January 9, 2011
Think I'll Do Another
The picture frame is finished and it was so much fun I'll do a couple more but this time to sell. Every time I do something new I learn a little more. With this one I started out on foil for easy clean up and to protect my work surface from paint and glue. It sounded like a good idea but the reflections from the foil make it hard to see the work. It also makes the photos difficult.
Below is a shot of the frame with the beads glued to the front. Like I said before the glue smell is so strong I could only work on it for short periods. Once all the beads and glue were dry on front I trimmed the strings and overhanging beads. I found out that using a hot fabric burner with a small tip is a great way to cut and finish the strings and burn away dried glue that was in the wrong spot.
I glued lines of beads around the inside and outside edges. After all that I went back and used clear Elmer's glue to fill holes where beads didn't stick or I needed to fill small spaces where I couldn't attach beads still on the string.

Below is the frame with all the beads attached. The opening in the frame is 4 x 6 and it starts out as a plain pine frame I bought at Michael's. The strings of beads were made in India and also bought at Michael's a couple years ago. They are fairly crude and uneven in size and color. The crosses and chunks of glass are from Fire Mountain Gems and Beads. The carved coral rose at the top to the top cross is also from Michael's. The turquoise skull is from a sting I bought at a bead show in Memphis.
Now that the frame is done it's Bob's job to find a picture he wants to put it in and find a place to put it in his "shrine".


Included below are pictures of the other items in the shrine. The shrine started with just the Our Lady of Guadalupe candle in the center of this picture. The other candles were gifts or purchased from various places around town.

Like I said before, Bob has a thing from the Sacred Heart. He picked up this picture just last week.

The heart and mirror are from a shop in a small Texas town. The ornament hanging from the mirror is a recent gift from our best friends.

Don't know where he got this, I think from that same shop in Texas.

This is piece of bone with an ink drawing of a dancing skeleton in a shadow box frame. He picked this up in Florida.

The candles below I couldn't resist. I purchased them from, Vicki Berndt, a seller on Etsy. They were a surprise Christmas gift.


Subscribe to:
Posts (Atom)